Howdy, coffee aficionados! I’m Sally Brewster, your trusty guide to all things coffee, and today, we’re about to dive headfirst into the wonderful world of Moka pot brewing. Whether you’re a coffee connoisseur or just someone looking to elevate your home coffee game, the Moka pot is about to become your new best friend. So, grab your favorite mug and join me for a caffeinated adventure!
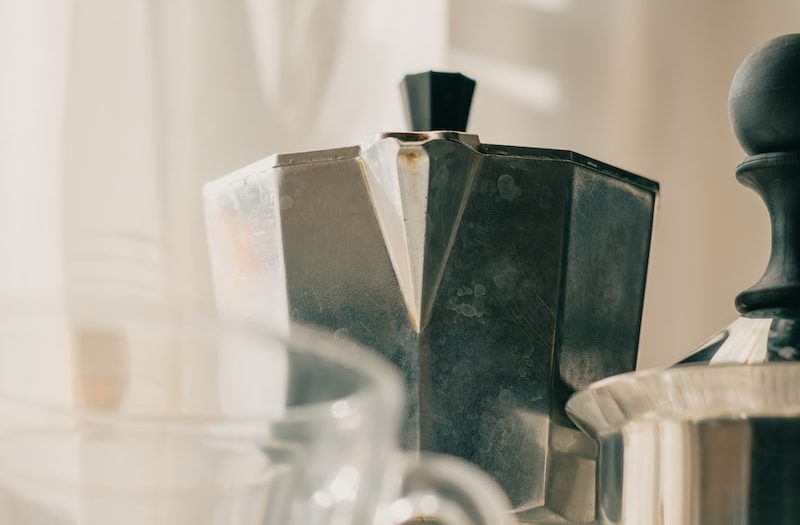
The Moka Pot – A Little Magic in a Stovetop Contraption
The Moka pot is the unsung hero of the coffee brewing world. It’s like a mini coffee genie in a stovetop contraption, granting your coffee wishes with each brew. This Italian invention, dating back to the early 20th century, has stood the test of time for a reason – it makes a mean cup of coffee.
working :
At first glance, a Moka pot looks like something right out of a mad scientist’s lab. It consists of three main parts: a bottom chamber for water, a middle chamber for ground coffee, and an upper chamber for the final brew. The process is simple yet fascinating. As the water in the bottom chamber heats up, it creates steam, which forces its way up through the coffee grounds and then condenses in the upper chamber as liquid coffee gold.
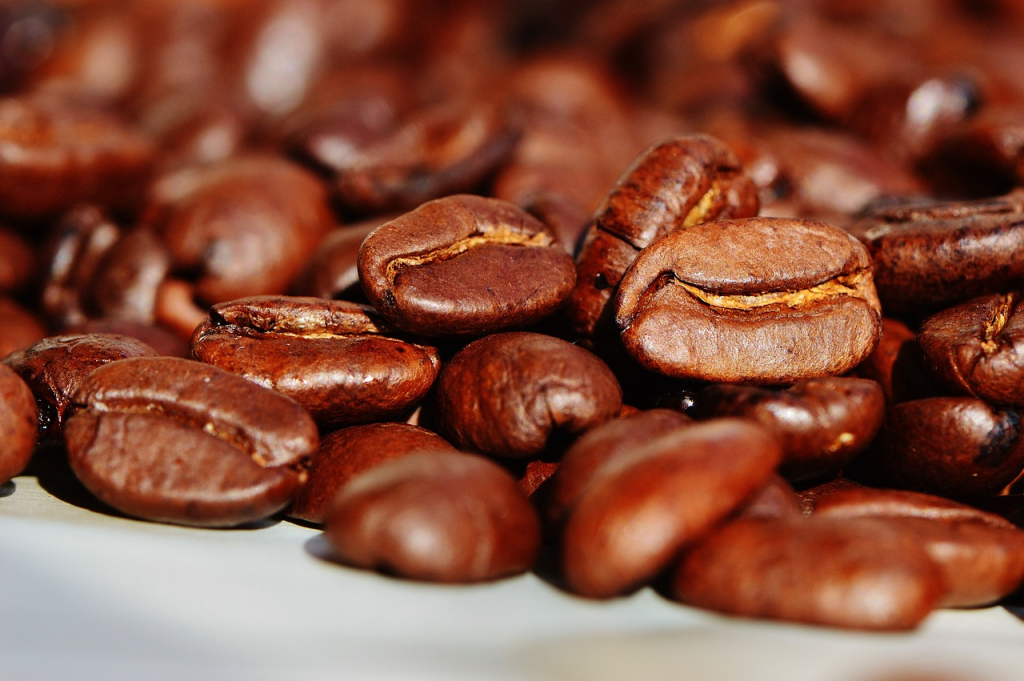
The Coffee Beans Matter
Before we get into the nitty-gritty of brewing with a Moka pot, let’s talk about the coffee itself. Like any coffee brewing method, the quality of your beans matters. Freshness is key! You’re not going to get that heavenly brew with stale beans. Opt for a medium roast – it strikes the perfect balance between acidity and body. Experiment with different origins and flavor profiles to find your personal favorite. Remember, brewing with a Moka pot is all about embracing your inner coffee artist.
Grind It Right
The next step in our Moka pot journey is grinding the coffee. The grind size is crucial. Think of it as Goldilocks looking for that “just right” balance. You want a fine to medium-fine grind, similar to table salt. Too fine, and your coffee will be over-extracted and bitter. Too coarse, and it’ll be weak and underwhelming. Aim for the sweet spot, and your taste buds will thank you.
Water – The Unsung Hero
Let’s talk water quality. You may not give it much thought, but the water you use plays a pivotal role in your coffee’s taste. Ideally, you want to use filtered or bottled water to avoid any unwanted impurities. The Moka pot is a stage for your coffee beans to shine, so don’t let subpar water quality steal the spotlight.
The Brewing Process
Now, let’s get down to business. Brewing with a Moka pot is part science, part art, and a whole lot of fun. Here’s a step-by-step guide to make your coffee dreams come true:
Assemble Your Tools and Ingredients
Gather your Moka pot, fresh coffee beans, a grinder, and filtered water. You’ll also need a heat source, whether it’s a gas stove, an electric stovetop, or even a campfire. Prepare your workspace and don’t forget your favorite mug!
Fill the Bottom Chamber with Water
Fill the bottom chamber of your Moka pot with cold, filtered water up to the safety valve. Don’t overfill it, and don’t tamp it down. You want it to be level with the valve, not above or below.
Add Your Coffee Grounds
Now, it’s time to add your freshly ground coffee to the middle chamber. Fill it up but avoid packing the grounds tightly. A gentle shake to level them off is perfect. The coffee should be level with the top of the chamber, but not packed down.
Assemble the Moka Pot
Screw the top and bottom chambers together, making sure they’re sealed but not too tight. You want the hot water to be able to push through the coffee grounds.
Brew It Up
Place your Moka pot on the heat source and let the magic begin. As the water in the bottom chamber heats up, it will create steam that pushes through the coffee grounds and into the upper chamber. You’ll know it’s ready when you hear that satisfying gurgling sound.
Serve and Enjoy
Remove the Moka pot from the heat source, pour the coffee into your favorite mug, and savor the moment. Don’t forget to add sugar, milk, or cream if that’s your jam. You’re the coffee artist here, so craft your perfect cup.
The Art of Moka Pot Brewing
Now that you’ve got the basic steps down, let’s talk about the artistry of Moka pot brewing. There are some tips and tricks to take your coffee to the next level.
Experiment with Coffee-to-Water Ratio:
The standard ratio is about 1:10 – 1 part coffee to 10 parts water. But feel free to tweak it to suit your taste. If you prefer a stronger brew, add a little more coffee. For a milder flavor, go easy on the coffee grounds.
Find Your Heat Sweet Spot:
Controlling the heat source is key. You want a steady, medium-low heat. Too high, and you’ll scorch the coffee. Too low, and it’ll take forever to brew. It might take a bit of trial and error to find your Moka pot’s perfect temperature.

Preheat the Water:
Want to speed up the brewing process and avoid over-extraction? Use hot water from the get-go. It’ll help your Moka pot reach the ideal brewing temperature faster.
Cleanliness is Key:
After every brew, give your Moka pot a little TLC. Disassemble it, rinse all the parts with warm water, and let them air dry. Never use soap, though – it’ll leave a residue that affects the taste.
Use a Towel to Hold the Hot Pot:
Safety first! When you’re unscrewing the chambers, they can get hot. Wrap a towel or use an oven mitt to protect your hands from scalding.
Olivia Sinclair is the creative mind behind the “Coffee Machines and Other Things Affiliate” blog. With a passion for all things coffee-related and a keen interest in the world of affiliate marketing, Olivia has managed to blend her two passions into a successful online venture. Born and raised in Seattle, the heart of coffee culture, Olivia’s love for coffee started at an early age. She spent her formative years exploring local coffee shops, learning the art of brewing, and appreciating the nuances of coffee beans from around the world.
After completing her Bachelor’s degree in Marketing and Communications, Olivia embarked on a career that led her into the world of affiliate marketing. She soon realized that her true calling lay in combining her marketing expertise with her love for coffee. This realization gave birth to the “Coffee Machines and Other Things Affiliate” blog, where Olivia shares her in-depth knowledge of coffee machines, brewing methods, and other related products. Her insightful reviews and well-researched recommendations have made her a trusted source for coffee enthusiasts seeking guidance on their purchases.
When she’s not busy exploring the latest coffee trends and testing new products, you can find Olivia hiking in the beautiful Pacific Northwest or honing her latte art skills. She believes in the power of a great cup of coffee to brighten anyone’s day and is dedicated to helping her readers find the perfect coffee-related products to elevate their coffee experience.